Monday, 16 February 2015

Automated Security Testing with ZAP API

      The OWASP Zed Attack Proxy (ZAP) is an easy to use integrated penetration testing tool for finding vulnerabilities in web applications.

      It is designed to be used by people with a wide range of security experience and as such is ideal for developers and functional testers who are new to penetration testing as well as being a useful addition to an experienced pen testers toolbox.

Zed Attack Proxy Features:
The latest version of ZAP 2.x is a client that runs on Windows, Linux and MacOS and requires Java 7. Here is a list of the main features:
  • Intercepting Proxy
  • Automated Scanner
  • Passive Scanner
  • Brute Force Scanner
  • Fuzzer
  • Port Scanner
  • Spider
  • Web Sockets
  • REST API
To know more about ZAProxy Tool, please visit: https://code.google.com/p/zaproxy/

Legal disclaimer: Only run ZAP against your own environments, i.e. Test, Staging environments. It is illegal to attack websites from competitors or other people.

In this post we will discuss about Automating Security Testing with the help of Selenium and ZAP API.


      ZAP provides a REST Application Programming Interface (API) which allows you to interact with ZAP programmatically.The REST API can be accessed directly or via one of the client implementations detailed below.In order to be able to use the API when using the ZAP UI you have to first enable it.

You can do this via the Options API screen:
Tools / Options... / API

     If you run ZAP in 'headless' or 'daemon' mode (by starting ZAP via the command line and using the -daemon flag) then the API will be automatically enabled.

Download ZAProxy tool and install it. 

Download Sample automated project from the below path:
https://github.com/continuumsecurity/zap-java-api/
Install POM.xml in local system and keep the project ready to run.

Now to start ZAP in headless mode, go to C:\Program Files\OWASP\Zed Attack Proxy where your ZAP got installed. From the directory open zap.bat and paste the below code and save it.

java -Xmx512m -XX:PermSize=256M -jar zap.jar -daemon

Now in the code use the below command to invoke the ZAP with headless mode:
Process p =  Runtime.getRuntime().exec("cmd /c zap.bat", null, new File("C:/Program Files/OWASP/Zed Attack Proxy/"));

From the dowaloaded github code, 'ZAProxyScanner.java' is the most important class which holds all the methods related to ZAP.

       Use spider method before scanning of the Application. This spidering can uncover the URL which we are not visting as part of the test execution.

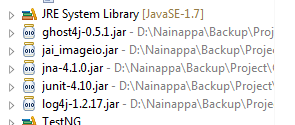
This project structure can be used to write our own test cases with TestNG integration framework.

For the information related to Test results please check the other post. :)

Image reading with Tesseract OCR API

       Tesseract is an open-source OCR engine that was developed at HP between 1984 and 1994.It is an optical character recognition engine for various operating systems(Includes windows, linux and Mac).It is free software, released under the Apache License, Version 2.0, and development has been sponsored by Google since 2006.Tesseract is considered one of the most accurate open source OCR engines currently available.

        This can be used effectively with Selenium for reading text from images, where sikuli may not be effective. Along with English, it also supports native languages such as Turkish, Spanish, Hindi, Swedish etc. This has typical architecture where we can feed the train data for the image recognitions.

The Process of integrating Tesseract OCR with java project is as below
Step1:
We need a JNA wrapper to use tesseract in our java project. We can use tess4j for this. It can be downloaded from here http://tess4j.sourceforge.net/

Step2:
Now extract the contents of the tess4j archive to workspace location.

Step3:
From eclipse, Open the Tess4j project.

Step4:
Now open a new project in eclipse and type below code:

import java.io.*;
import net.sourceforge.tess4j.*;
public class MySample {
public static void main(String[] args) {
File imageFile = new File(“<path of your image>”);
Tesseract instance = Tesseract.getInstance(); 
try {
String result = instance.doOCR(imageFile);
System.out.println(result);
} catch (TesseractException e) {
System.err.println(e.getMessage());
}
}
}
}

Step5:
Now expand the Tess4j project and expand source packages; inside you will find 3 packages. Copy all of them into your project’s source packages. It should now look like as shown below.


Here "OCR" is the project I created.

Step 6:
Right click on the project. Go to Build Path--> Configure Build Path--> Add external JARs.


Navigate to the location where you extracted the tess4j archive. Open the folder (Tess4j) and navigate to lib. There you will see 4 jar files. Choose all of them and click open. Your project space should look like as shown below now. 


Step 7:
Now you will find 2 dll files in the Tess4j folder (The folder which you extracted) namely liblept168.dll and libtesseract302.dll. Copy these two files into the src package and it should now look like as shown below.


Thats it…!!! You are done. When you run this code, it should display the text content in console window of Eclipse.

Thursday, 6 November 2014

Its Time for change - Get rid of au3 and exe file for using AutoIT

     In this series now I am going to dicuss about how to get rid of au3 files and exe files for using AutoIT. We all know how to use AutoIT along with automation code. Its lengthy and tedious process as we have to write AutoIT code and convert them into exe files and maintain all exe files that you use in your code. 
      Lets try an approach which makes this procedure easy.AutoIT allows for GUI automation using a very simple syntax and can be useful for testing Windows applications. It is packaged with AutoItX which supports accessing AutoIt functions through COM objects.AutoItX4Java uses JACOB to access AutoItX through COM and strives to provide a native Java interface while maintaining the simplicity of AutoIt. Getting started is simple.

Requirements: 
1. AutoIT DLL that supports JACOB protocol jacob-1.17-M2-x86.dll 
2. autoitx4java.jar which uses JACOB a Java bridge to run activex components of Autoit (jacob-1.17-M2-x86.dll) 
Both can be freely downloaded from the below links           
http://code.google.com/p/autoitx4java/downloads/list 
http://sourceforge.net/projects/jacob-project/ or use Autoit.dll  that gets downloaded together with AutoIT installation in windows machine. 
          
Steps used to set up: 
1. Add jacob.jar and autoitx4java.jar to your library path.      
2. Place the jacob-1.15-M4-x64.dll file in your library path.(Create a "lib" folder in project space and place jacob-1.15-M4-x64.dll in the    folder)
3. Start using AutoItX.

//sample code for the above approach
File file = new File("lib", "jacob-1.18-M2-x86.dll"); //path to the jacob dll
System.setProperty(LibraryLoader.JACOB_DLL_PATH, file.getAbsolutePath());
AutoItX x = new AutoItX();
String notepad = "Untitled - Notepad";
String testString = "this is a test.";
AutoITutils.startApp("C:\\Windows\\system32\\notepad.exe");
AutoITutils.waitforAppToLoad(notepad);
AutoITutils.setText(notepad, "Edit1", testString);
String strtemp=AutoITutils.getTextfromField(notepad, "Edit1");
x.winWaitActive(notepad);
x.send(testString);
System.out.println(x.winExists(notepad, testString));        
x.winClose(notepad, testString);
       

Wednesday, 5 November 2014

Its Time for AutoIT - Parameterizing AutoIT Script through Java

                Many of us are aware that we can use AutoIT for handling windows based popups and Files uploading etc. Now Iam going to discuss about much more advanced usage of this AutoIT. When I was using this AutoIT for files uploading, I got scenario of uploading multiple files in different places. But if I use AutoIT script with the hard coded file path, I cannot use it for other files. Only way I got is to pass parameters to my AutoIT exe file while I run it. AutoIT provides us options for sending parameters from our java code.The below commands from the AutoIT will be used for doing that.

$CmdLineRaw - This command takes the whole text as a single parameter.
Lets see an example with the above command.

Below is the AutoIT script
#include <Constants.au3>
; This displays mesage box with the parameterized text
$text =$CmdLineRaw
MsgBox($MB_SYSTEMMODAL, "My First Script!", $text)

Java code looks like below:

String command="D:/Backup/Project/OwnWorkspace/AutoIT/notepad.exe This is parameterized test";
Runtime.getRuntime().exec(command);

Now the next question is how to multiple parameters.AutoIT provides option for this as well. Below commads are used for doing that.

$CmdLine[0] ; Contains the total number of items in the array.
$CmdLine[1] ; The first parameter.
$CmdLine[2] ; The second parameter.
...
$CmdLine[nth] ; The nth parameter e.g. 10 if the array contains 10 items.

Lets see an example with the above commands:

#include <Constants.au3>
; This displays given text in the notepad
$title =$CmdLine[1]
$text=$CmdLine[2]
Run("C:\Windows\notepad.exe")
Sleep(1000)
WinWaitActive($title)
WinFlash($title)
Sleep(3000)
Send($text)

Java Code:
String command="D:/Backup/Project/OwnWorkspace/AutoIT/notepad.exe \"Untitled - Notepad" \"Hi this is notepad\"";
Runtime.getRuntime().exec(command);

D:/Backup/Project/OwnWorkspace/AutoIT/notepad.exe--it is a path where you stored your .exe file which got converted from au3 file

Wednesday, 29 October 2014

Automating CAPTCHA using selenium webdriver

The full form of CAPTCHA is - "Completely Automated Public Turing test to tell Computers and Humans Apart".

A CAPTCHA is a program that  protects  websites against bots  by generating and grading tests that humans can pass but current computer programs cannot.

Captchas are not brakeable but there are some third party captchas that can be breakable and one of the example for it is "jQuery Real Person" captcha. 

It is possible to bypass the captcha on the JQuery-Real-Person plugin to perform a brute force attack.

There is associated parameter with each image, to checkout the characters introduced by the user. But there is not a good chek to assure that the
characteres introduced are the characters shown on the picture.

Therefore we can just choose a pair of parameter and characters and use them in all the request to the web server.

The name of the parameter that determinate the captcha image is "value".
   
Example: The captcha image shown in the example is JYYBME and we use "Inspect Element" on Google Chorme or Firebug on Firefox to search this
line in the code:
  
<input type="hidden" class="realperson-hash" name="defaultRealHash" *
value="-1158072107"*>
  
In this case we already know a valid pair of parameter and characters that we can use to perform a brute force attack bypassing the captcha restriction.

JYYBME ----> *-1158072107*

We can generate as many valid pairs as we want but only one is necessary to perform the brute force attack.


It does not matters that the captcha does not show the characters that we type because the check is done through the value parameter so we just need to type one valid pair of parameter and characters.

The below example illustrates how to break captcha with jQuery Real Person plugin.

import org.openqa.selenium.By;
import org.openqa.selenium.JavascriptExecutor;
import org.openqa.selenium.WebDriver;
import org.openqa.selenium.firefox.FirefoxDriver;

 public class Sample { 
  
  static WebDriver driver;
  
 public static void main(String args[]){ 
 try{
  driver = new FirefoxDriver();
  //Loading jQuery Real Person Captcha demonstration page
  driver.get("http://keith-wood.name/realPerson.html");
  Thread.sleep(2000);
  JavascriptExecutor js = (JavascriptExecutor) driver;
  //Setting the captcha values
  js.executeScript("document.getElementsByName('defaultRealHash')[0].setAttribute('value', '-897204064')");
  driver.findElement(By.name("defaultReal")).sendKeys("QNXCUL");
  //Submit the form
  driver.findElement(By.xpath(".//*[@id='default']/form/p[2]/input")).submit(); 
 }
 catch(Exception e){
 //gulp the exception
 }
 }

}

Below are some of the workarounds that we can do to handle captchas in testing scenarios:
  • Captcha is build to avoid automation. But if this is some kind of blocking your testing in QA environment then there is a way to do it. Developers are generating captcha code and display as image. This generated captch code might be stored somewhere in database. Ask your developer the db detail of for storing captcha code and get the code from there and validate on the front.

  • You can ask your development team set a default password/captcha Which you can use to automate in order to check if the flow works fine.Beaware that it is not going to be a test to test Captcha works as such but to check if the flow/scenario that includes captcha pre & pro works accurate.


Tuesday, 28 October 2014

Extracting text from PDF files using Selenium + PDF Box

In many production environments, PDF files need to be checked before going to print  or send to customer in order to avoid Legal issues and costly reprints.This PDF files cannot be read by using Selenium. So, here we use PDFBOX, which is third party jar file that reads data from PDF Files. The below example illustrates how to read PDF file by opening them in the browser. To work with this, add the below jar file in classpath of eclipse along with selenium webdriver.
pdfbox-app-1.8.3.jar


import java.io.BufferedInputStream;
import java.io.IOException;
import java.net.URL;
import java.util.concurrent.TimeUnit;
import org.apache.pdfbox.pdfparser.PDFParser;
import org.apache.pdfbox.util.PDFTextStripper;
import org.openqa.selenium.WebDriver;
import org.openqa.selenium.firefox.FirefoxDriver;

public class Sample {

 Static WebDriver driver;

   public Static void main(String args[]) throws IOException{
 try{
    // Proxy has to be set if we working under any firewal 
   System.setProperty("http.proxyHost", "proxyname.com");
System.setProperty("http.proxyPort", "portnumber");
System.setProperty("https.proxyHost", "proxyname.com");
System.setProperty("https.proxyPort", "portnumber");
driver = new FirefoxDriver();
 driver.get("http://keith-wood.name/realPerson.html");
 driver.manage().timeouts().implicitlyWait(10, TimeUnit.SECONDS);
 URL url = new URL(driver.getCurrentUrl()); 
 BufferedInputStream fileToParse=new BufferedInputStream(url.openStream());

 //parse()  --  This will parse the stream and populate the COSDocument object. 
 //COSDocument object --  This is the in-memory representation of the PDF document

 PDFParser parser = new PDFParser(fileToParse);
 parser.parse();

 //getPDDocument() -- This will get the PD document that was parsed. When you are done with this document you must call    close() on it to release resources
 //PDFTextStripper() -- This class will take a pdf document and strip out all of the text and ignore the formatting and such.

 String output=new PDFTextStripper().getText(parser.getPDDocument());
 System.out.println(output);
 parser.getPDDocument().close(); 
 driver.manage().timeouts().implicitlyWait(100, TimeUnit.SECONDS);
 }
 catch(Exception e){
 System.out.println(e.getMessage());
 }
  }

}


Wednesday, 17 September 2014

Archiving Log4j Reports with Runtime Path

    General Log4j Reports will be stored in the path which is specified in the Log4j.properties or Log4j.xml. But in case if one need to pass reports path in runtime(eg: Time Stamped folder names), we have to override the existing Log4j properties. The below example shows how to archive the reports in the folder which will be passed in runtime.

The below method will override the existing properties of Log4j. Here I am overriding file location and I will pass it in runtime.

public void updateLog4jConfiguration(String logFile) {
       Properties props = new Properties();
       try {
           InputStream configStream = getClass().getResourceAsStream( "/log4j.properties");
           props.load(configStream);
           configStream.close();
       } catch (IOException e) {
           System.out.println("Error: Cannot load configuration file ");
       }
       props.setProperty("log4j.appender.FileAppender.File", logFile);
       LogManager.resetConfiguration();
       PropertyConfigurator.configure(props);
   }

This method has to be called with foldername as parameter and before executing your suite(ideally before starting any of your activity).

eg: updateLog4jConfiguration("C:\\Reports\\Report.log");

Below is the Log4j.property file used for the above example:

log4j.rootLogger=WARN
log4j.logger.com.pgx=DEBUG,FileAppender,ConsoleAppender
log4j.appender.FileAppender=org.apache.log4j.FileAppender
log4j.appender.FileAppender.File=./target/logs/report.log
log4j.appender.FileAppender.layout=org.apache.log4j.PatternLayout
log4j.appender.FileAppender.layout.ConversionPattern= %d{yyyy-MM-dd HH:mm:ss} %-5p: %m%n
log4j.appender.ConsoleAppender=org.apache.log4j.ConsoleAppender
log4j.appender.ConsoleAppender.layout=org.apache.log4j.PatternLayout
log4j.appender.ConsoleAppender.layout.ConversionPattern= %d{yyyy-MM-dd HH:mm:ss} %-5p: %m%n

In this example, we changed only log file location but you can even change pattern, layout, log level and any of the values in log4j.properties file.
 
The main trick here is to put following lines in your running code to reset Lo4j with the new values.
LogManager.resetConfiguration();
PropertyConfigurator.configure(props);